Regression Test Suite Template and 9-Step Build Guide
A regression suite stops helping the day nobody trusts it. Build one in nine steps, manual or automated, with a register, test case card and checklist to copy.

A regression test suite is a list of promises to your users. Each test says something worked last release and still works now. The list only protects you while it runs on every change, and the day your team stops trusting it is the day they stop running it.
One frontend change can turn dozens of tests red, and the fix competes with feature work. Here is how to build a suite that outlasts the redesign, for a team that ships every week.
What you’ll learn
- A suite register, test case card and pre-release checklist you can copy into a sheet
- A 9-step framework for building a regression suite that engineers actually run
- Real test case structures for the auth and checkout flows
- How to size each tier from its time budget, with the arithmetic
- The mobile-only cases a web-first suite never covers
What Is a Regression Test Suite? Suite vs Plan vs Checklist
A regression test suite is the set of tests you re-run during regression testing to confirm that last release’s behavior still holds. Each test guards one flow, and the suite is tiered by risk so the highest-risk flows run on every change. Two neighbors get mistaken for it.
| Document | Question it answers | Lives in |
|---|---|---|
| Regression test suite | Which tests re-run on every change? | Your repo or test tool |
| Regression test plan | Who runs the suite, and what counts as a pass? | One doc per product |
| Regression checklist | Did we confirm everything before this build shipped? | One ticket per release |
The test plan is the agreement you write once and revisit rarely. The suite and the checklist are the working documents, so the template below covers those two.
Regression Suite in Manual Testing
In manual testing, the suite is the same list run by hand from a sheet. A manual case can stay small, because a person works through them one after another. An automated test works better as a whole flow, and we have seen teams turn a long list of small manual cases into a short list of flow-sized tests.
The register below has one row per flow for that reason. Its Run by column marks the rows a person still runs, and a row moves to automation once it has stayed stable across releases. Manual vs automated testing covers how to make that call.
Regression Test Suite Template: Register, Test Case Card, and Checklist
Copy these three pieces into a sheet or your test tool. They work the same whether people or machines run the tests.
- Register: The flows the suite protects, one row each.
- Test case card: The steps and expected results for one test.
- Release checklist: What to confirm before a build ships.
The Suite Register
The register lists what the suite protects and what each flow costs to run, one row per flow instead of one row per test. It works almost like a ledger. Every row spends part of your run-time budget, so every row has to justify its slot. Below is a filled-in example for a mobile commerce app.
| Flow | Tier | Run by | Runtime | Traces to |
|---|---|---|---|---|
| Sign in with email and password | P0 | Automated | 20 s | Authentication scope |
| Checkout with a saved card | P0 | Automated | 60 s | Payments scope |
| Expired session redirects to login | P1 | Automated | 25 s | Authentication scope |
| Open an order from a deep link | P1 | Automated | 30 s | Mobile launch scope |
| Checkout with an expired card | P2 | Automated | 45 s | Past payment bugs |
| Receive a push notification and open its screen | P2 | Manual | 10 min | Mobile launch scope |
- Tier: Risk sets the tier (Step 2) and the time budget caps it (Step 6). P0 flows run on every pull request, P1 flows nightly, and P2 flows before a release.
- Run by: Automated or manual. A manual row is a candidate for automation once it stays stable.
- Runtime: What the flow costs against its tier’s time budget (Step 6).
- Traces to: The scope item from Step 1 or the production bug that earned the row.
A row that traces to nothing gets deleted. To paste the register into a spreadsheet, start from this header and one row:
Flow,Tier,Run by,Runtime,Traces to,Owner,Last failed,Last reviewed
Checkout with a saved card,P0,Automated,60 s,Payments scope,,,
The last three columns track upkeep. Owner names who answers for the row, Last failed dates its latest red run, and Last reviewed dates the last time someone confirmed it still earns its slot.
The Test Case Card
Write one card per test. Fill Expected with states you can see or query, such as a screen, a token or a record, and never with the word “works.” Step 4 writes out three cards for authentication and three for checkout.
ID:            TC-AUTH-001
Flow:          (the register row this test belongs to)
Title:         (what must keep working, in one line)
Tier:          P0 | P1 | P2
Run by:        automated | manual

Preconditions:
  - (account, data, build, feature flags)

Steps:
  1.
  2.
  3.

Expected:
  - (a screen state you can see)
  - (a record or token you can query)

Traces to:     (scope item or bug ID)
Last failed:   (date, or "never")
The Pre-Release Checklist
Copy a fresh checklist into the release ticket every time. The first block is where release-day surprises hide, and the last block keeps the register current.
Before the run
[ ] Build under test is the release candidate (build number noted)
[ ] Test environment runs the same service versions as production
[ ] Test accounts and data reset to a known state
[ ] Feature flags match production
[ ] Quarantine list reviewed, and no P0 test is on it

The run
[ ] P0 tier green on the latest OS, one previous major version and the oldest supported OS
[ ] P1 tier green
[ ] P2 tier green, or each red row triaged
[ ] Every failure is a bug, a test fix, or a quarantine entry with an owner and a date

After the run
[ ] Every bug that escaped since the last release has a test, or a note on why not
[ ] Register updated: new flows added, tests for removed flows retired
[ ] Results saved against the build number, and the release owner has signed off
One line on the checklist is a rule. No P0 test sits in quarantine on release day, because a quarantined P0 is a flow you ship unwatched.
TLDR: the register says what the suite protects and the card says how. The checklist says when you can ship. The nine steps below explain how to fill each one in.
Steps 1–3: Prepare Your Regression Test Suite (Scope, Select, Structure)
Step 1: Define Your “Blast Radius”
Before writing a single test, answer one question. What would have to break for your users to notice immediately?
Written down, the list is short:
- Core Actions: Payment processing, authentication, core navigation.
- Account Mutations: High-stakes settings changes (like billing or permissions).
- Mobile Specifics: Crash-free app launch, deep link handling, push notification execution.
Write this list down in a short, plain-language document your entire team agrees on. This is your regression scope. Every test you write must trace back to this list. If it doesn’t, it belongs in an integration run, not in this suite.
Why this matters: When your suite grows and CI pipelines start timing out, this scope statement tells you exactly which tests run on every single PR and which can wait for the nightly build.
Step 2: Select and Prioritize Test Cases by Risk
A suite cannot cover everything, so rank what goes in by three risk factors:
- Revenue Impact: If it breaks, do you lose money or lock users out? (e.g., Checkout, Login). These run on every PR.
- Code Volatility: Which areas of the codebase are your developers touching multiple times a week? Check your last 90 days of diffs. High-traffic code needs nightly validation.
- Scar Tissue: Look at your bug reports from the last six months. Every production failure is a regression test waiting to be written.
Skip the massive matrices and bucket by tier. Keep P0 for the critical paths (Auth and Checkout happy paths), which run on every PR. Volatile code goes to P1, which runs nightly. Push environmental edge cases such as expired cards and empty states to P2, which runs before a release.
Step 3: Architect Around User Flows, Not Code Features
Suites tend to mirror the codebase, with a “login” folder, a “checkout” folder and a “profile” folder. A bug that spans login and checkout scatters its failures across directories, and nobody can pinpoint the root cause.
Organize by user flow instead. A flow is a sequence of actions a real human takes to accomplish a goal.
- “New user signs up, adds a product, and completes a purchase” is a flow.
- “Login tests” is just a component check.
Flow-organized suites do three things:
- They catch integration failures that single-feature tests entirely miss.
- They produce failure messages that tell you exactly which user journey is broken, rather than just spitting out a broken page selector.
- They match the team’s mental model of how the product works, so hand-offs stay simple.
Five to eight core flows is a workable starting point. Name them in plain language, and you have the rows of your register.
Skip the Blank Register
See your core flows drafted as Pie test cases before you fill in a row.
Steps 4–6: Create Regression Test Cases, Automate Them, and Connect to CI
Scope without execution is documentation. Steps 4 through 6 are where your regression suite becomes a real engineering artifact.
Step 4: Write Test Cases with Concrete Examples
Writing “test the critical flows” is easy. Here is what two of those flows look like as cards, trimmed to preconditions, steps and expected results.
Authentication test cases:
Before you write auth tests, decide what “authentication working” means end to end. A login button that submits a form is the smallest part of it. Valid login, invalid credentials and session expiry are three separate test cases, and the cards below write each one out:
Test Suite: Authentication Flow
Test Case: TC-AUTH-001: Valid user login (email + password)

Preconditions:
  - Test account credentials available (email: testuser@example.com)
  - User is logged out (session cleared)

Steps:
  1. Launch app / navigate to login screen
  2. Enter valid email address
  3. Enter valid password
  4. Tap "Sign In" button
  5. Wait for home screen to render

Expected Results:
  - Home screen renders within 3 seconds
  - User display name visible in header
  - Session token present in storage
  - No error toast or modal displayed

Test Case: TC-AUTH-002: Invalid credentials show correct error

Steps:
  1. Launch app / navigate to login screen
  2. Enter valid email, enter wrong password
  3. Tap "Sign In"

Expected Results:
  - Error message displayed: "Incorrect email or password"
  - User remains on login screen
  - Password field cleared, email field retained
  - No session token created

Test Case: TC-AUTH-003: Session expiry redirects to login

Preconditions:
  - User is logged in with a session token
  - Token expiry manually triggered (test environment only)

Steps:
  1. Trigger session expiry
  2. Attempt any authenticated action (e.g., load profile)

Expected Results:
  - Redirect to login screen
  - Session-expired message shown (if applicable)
  - Previous destination preserved for post-login redirect
Checkout test cases:
Checkout is where revenue-critical regressions live, and they rarely show up as “checkout broken.” They show up as “checkout broken under one condition”, such as a payment method, a promo code format or a device size. Write the checkout cards around those conditions as well as the happy path.
Test Suite: Checkout Flow
Test Case: TC-CHK-001: Happy path, single item checkout with saved card

Preconditions:
  - User logged in
  - One item in cart (in-stock SKU)
  - Valid saved payment method on account

Steps:
  1. Navigate to cart
  2. Verify item shown with correct price
  3. Tap "Proceed to Checkout"
  4. Verify shipping address pre-populated
  5. Verify saved card shown as default
  6. Tap "Place Order"
  7. Wait for order confirmation screen

Expected Results:
  - Order confirmation displayed with order ID
  - Confirmation email triggered (check test inbox)
  - Cart cleared
  - Inventory decremented in system (API check)

Test Case: TC-CHK-002: Coupon code applied before checkout

Steps:
  1. Navigate to cart with item
  2. Enter valid promo code in coupon field
  3. Tap "Apply"
  4. Proceed to checkout

Expected Results:
  - Discount applied to cart total
  - Discounted price visible on checkout summary
  - Order total reflects discount in order confirmation

Test Case: TC-CHK-003: Expired card shows payment error

Steps:
  1. Navigate to checkout
  2. Select expired card as payment method
  3. Attempt to place order

Expected Results:
  - Payment declined error displayed
  - User prompted to update payment method
  - Order NOT created in system
  - Cart items preserved
Step 5: Automate Test Execution
The test cases above are the spec. Automation is how you run them at scale without human involvement. For most mobile and web teams, there are two practical approaches:
- Selector-based automation: Playwright and Espresso locate elements by ID, label or visible text. Fast to write, expensive to maintain, because every locator is hardcoded into the test.
- Behavior-based automation: Vision-based or model-driven tools find elements by what they look like and what they are. More resilient to UI changes. Self-healing tests extend this: when an element moves, the test can adapt instead of failing.
Which approach fits depends on how much upkeep you can afford. This ranking of regression testing tools sorts ten of them by the way suites fail, and the walkthrough on how to automate regression testing covers the wiring.
Here is what selector-based automation looks like for TC-CHK-001 in a mobile context (pseudocode, framework-agnostic):
# TC-CHK-001: Happy path checkout with saved card
# This test validates the complete purchase flow from cart to confirmation.
# P0 flow: runs on every PR.

def test_checkout_happy_path_saved_card(driver, test_user):
    # Setup: ensure cart has exactly one in-stock item
    add_item_to_cart(driver, sku="ITEM-001", quantity=1)

    # Navigate to cart and verify state
    navigate_to_cart(driver)
    assert get_cart_item_count(driver) == 1
    assert get_cart_item_price(driver, "ITEM-001") == EXPECTED_PRICE

    # Proceed through checkout
    tap_element(driver, label="Proceed to Checkout")
    assert shipping_address_is_prefilled(driver, test_user.address)
    assert default_payment_method_is_visible(driver, test_user.saved_card)

    # Place order
    tap_element(driver, label="Place Order")
    wait_for_screen(driver, screen_id="order_confirmation", timeout=5)

    # Verify confirmation state
    order_id = get_order_id_from_screen(driver)
    assert order_id is not None
    assert cart_is_empty(driver)
    assert order_exists_in_system(order_id)  # API call to backend
Each automated test should verify state at several points along the way. If the confirmation screen loads but the cart was not cleared, that is a bug. If the order ID is displayed but the backend record does not exist, that is a bug. A test that only checks the final screen misses both.
Step 6: Integrate with Your CI/CD Pipeline
A test that nothing triggers protects nothing. Every modern CI system (GitHub Actions, GitLab CI, CircleCI, Bitrise for mobile) supports a test stage before merge, so the open question is which tests run on which trigger.
In CI/CD, segmentation matters most, because not every test needs to run on every trigger. Use labels or tags to define three tiers:
@smoke: Runs on every PR (under 10 minutes total).@regression: Runs nightly and on merge to main (can be up to 45 minutes).@release: Full suite plus edge cases, runs before production deploy.
In the register, P0 rows carry @smoke, P1 rows add @regression and P2 rows join the @release run. Keep your smoke tier ruthlessly small. When smoke tests start taking 25 minutes, developers stop waiting for them. When developers stop waiting, CI loses its value as a quality gate.
How Many Test Cases Belong in a Regression Suite?
Size each tier from its time budget instead of picking a number. Divide the minutes a tier is allowed by the average runtime of one flow, then multiply by the runners you can use in parallel. A ten-minute pull request tier with 30-second flows fits 20 flows on one runner and 40 on two. When a tier fills, the register’s Runtime column shows which row to demote, shard or delete. The budget makes the count a consequence of your pipeline.
Steps 7–9: Cover Mobile, Fight Flakiness, and Maintain Your Regression Test Suite
The first six steps build a suite. Steps 7 through 9 determine whether it survives contact with production engineering.
Step 7: Build Mobile-First Coverage into Your Suite
A suite built web-first treats mobile as an afterthought, and for teams building native apps that order is backwards. Your mobile suite needs to cover scenarios that have no equivalent on web, and mobile regression testing has its own failure pattern when devices and releases multiply:
-
Gesture coverage: Tap, swipe, pinch, scroll-to-load are not edge cases on mobile. A swipe-to-delete gesture on a cart item that silently fails is a checkout regression. Add gesture interactions for every core flow that uses them.
-
Deep link handling: If your app supports deep links, verify that authenticated deep links work, unauthenticated deep links redirect to login and return the user afterward, and malformed deep links do not crash the app.
-
OS version and screen size: Regression does not mean “works on my device.” Test across the OS versions your users run. App Store Connect shows usage by OS version, and Play Console statistics let you group by Android version. Run your P0 tests on the latest OS, one previous major version and your lowest supported version.
-
Network conditions: Checkout flows that depend on real-time payment authorization need to be tested under degraded network conditions. A flow that succeeds on WiFi but fails on 3G is a real regression waiting to ship.
-
Background and foreground transitions: On mobile, users switch apps mid-flow. A user who puts your app in the background during checkout and returns 90 seconds later should find their session intact and their cart unchanged. If they do not, that is a regression.
Step 8: Address Flakiness Before It Poisons Your Suite
Picture the arc. The suite works well for a while, then tests start failing at random. Someone disables the failing ones to unblock a merge. Soon the quarantine list is long, and nobody trusts the suite enough to read a red run.
Flaky tests split into three causes, and each needs a different fix:
- Timing: Tests assume a loading state ends in exactly two seconds instead of waiting for a ready signal. Replace hardcoded sleeps with explicit waits tied to page readiness. Wait for the element to render, not for a duration.
- Shared state: Tests pass or fail depending on execution order because they read or write shared data, such as a cache, a database or a login session. Each test should set up and tear down its own data, and none should assume another test ran first.
- Element location: Tests break when a button gets a new CSS class or moves to another container, because selectors point at implementation details. Self-healing tests find the element on screen again each run, so a button that moves usually no longer fails the test.
Quarantining a flaky test buys time, and every quarantined test is a regression that can now ship without detection. Give each entry an owner and a date. Review the list weekly, and treat it as technical debt with a deadline.
Step 9: Maintain Your Regression Test Suite Without the Backlog
Upkeep is what kills a suite. When a UI redesign breaks dozens of locators overnight, someone has to fix them. If that means an engineer hunting down and updating selectors by hand, the suite falls behind your release cycle. Feature work wins that trade, and the suite gets abandoned.
Two shifts break the cycle.
Prioritize Coverage Density Over Suite Size
More tests do not equal better testing. Every overlapping test adds to your maintenance bill.
A team we spoke with showed us the trade-off. Their manual regression suite had grown until they called it bloated, and we mapped it into about 600 Pie tests, folding granular cases into single flows along the way. We asked whether 600 was the number they wanted. They planned to go through the tests and merge the similar ones, and they asked for a way to merge tests in one step.
Audit your suite with one question. Which single test should catch this bug first? Each critical failure needs one primary validator, not six. Prune the tests that cover identical code paths, and run time and upkeep drop without lowering your guard. The register’s Traces to and Last failed fields tell you which rows are candidates. For the longer case on pruning, see why your regression suite slows you down.
Keep the Register Current With Pie
The register above is a sheet someone has to keep honest. Most of its columns have a home in Pie, so the sheet shrinks to the parts only your team knows.
| Register column | Where Pie keeps it |
|---|---|
| Flow | A test case, drafted in plain language in Pie Chat |
| Tier | A suite per tier, started by a Loop on a schedule, on a new mobile build or from CI |
| Run by | Pie runs the automated rows. Manual rows stay in your sheet |
| Traces to | The key feature the test case belongs to |
| Last reviewed | Last edited on the test case, which opens its version history |
| Last failed | Run History, where each run marks every test Pass or Fail |
Runtime and Owner stay in your sheet, and so does a review that changed nothing. Three features do the upkeep:
- Pie Chat: Describe a flow in a sentence and Pie drafts the test case, with an Objective and what should be verified. Nothing runs until you select Create test case.
- Edit with AI: When a flow changes on purpose, start from “Fix this testcase” or “Strengthen the assertions”. Changes stay in your draft until you save, and Undo reverses the last AI change.
- Discovery: Autonomous discovery explores your app and generates a first set of tests under key features, so the first register is a review job.
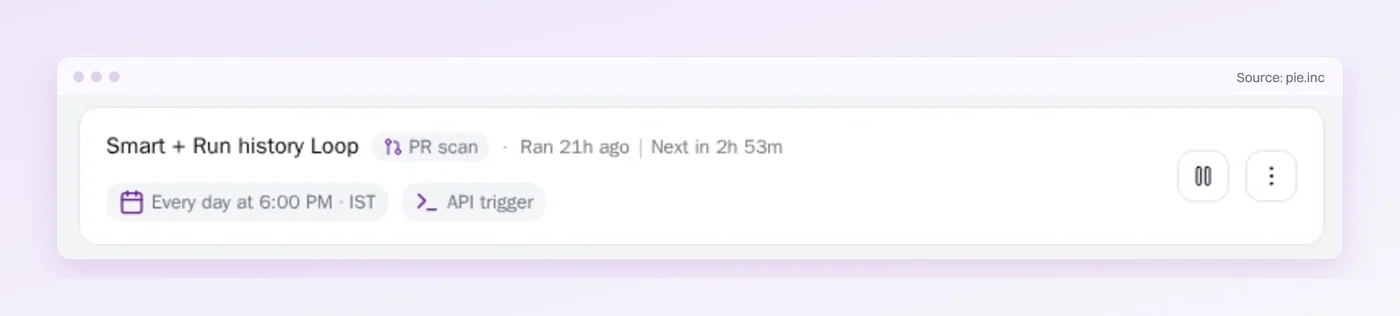
Flows that need code-level control stay in your own framework, and your register can list them too.
Keep Only the Promises You Can Still Check
Nine steps, one artifact: a register of promises your suite can keep. Every row names a flow your users count on, and every tier says how often you check it. Keep it short enough that a new engineer reads it in one sitting, and cut a row the day it stops matching the app.
Get that right and release day stops being the day you find out what broke. It becomes the day you ship.
Keep the Suite Current
Keep your register's tests, tiers and run history in Pie.
Frequently Asked Questions
Eight years building search and delivery systems at Amazon. The kind of scale where flaky tests block billion-dollar releases. Now CTO at Pie, building AI agents that adapt when your UI changes. LinkedIn →